Cheesecake inspires more anxiety than almost any other dessert. Will it crack? Will it fall? Will the center be raw while the edges overcook? The good news: once you understand why cheesecakes crack and how to prevent it, you'll produce stunning, bakery-quality results every time.
This guide focuses on the iconic New York style—dense, rich, and impossibly creamy—but the techniques apply to any cheesecake variation.
Our Cheesecake Recipes
Cheesecake Styles Explained
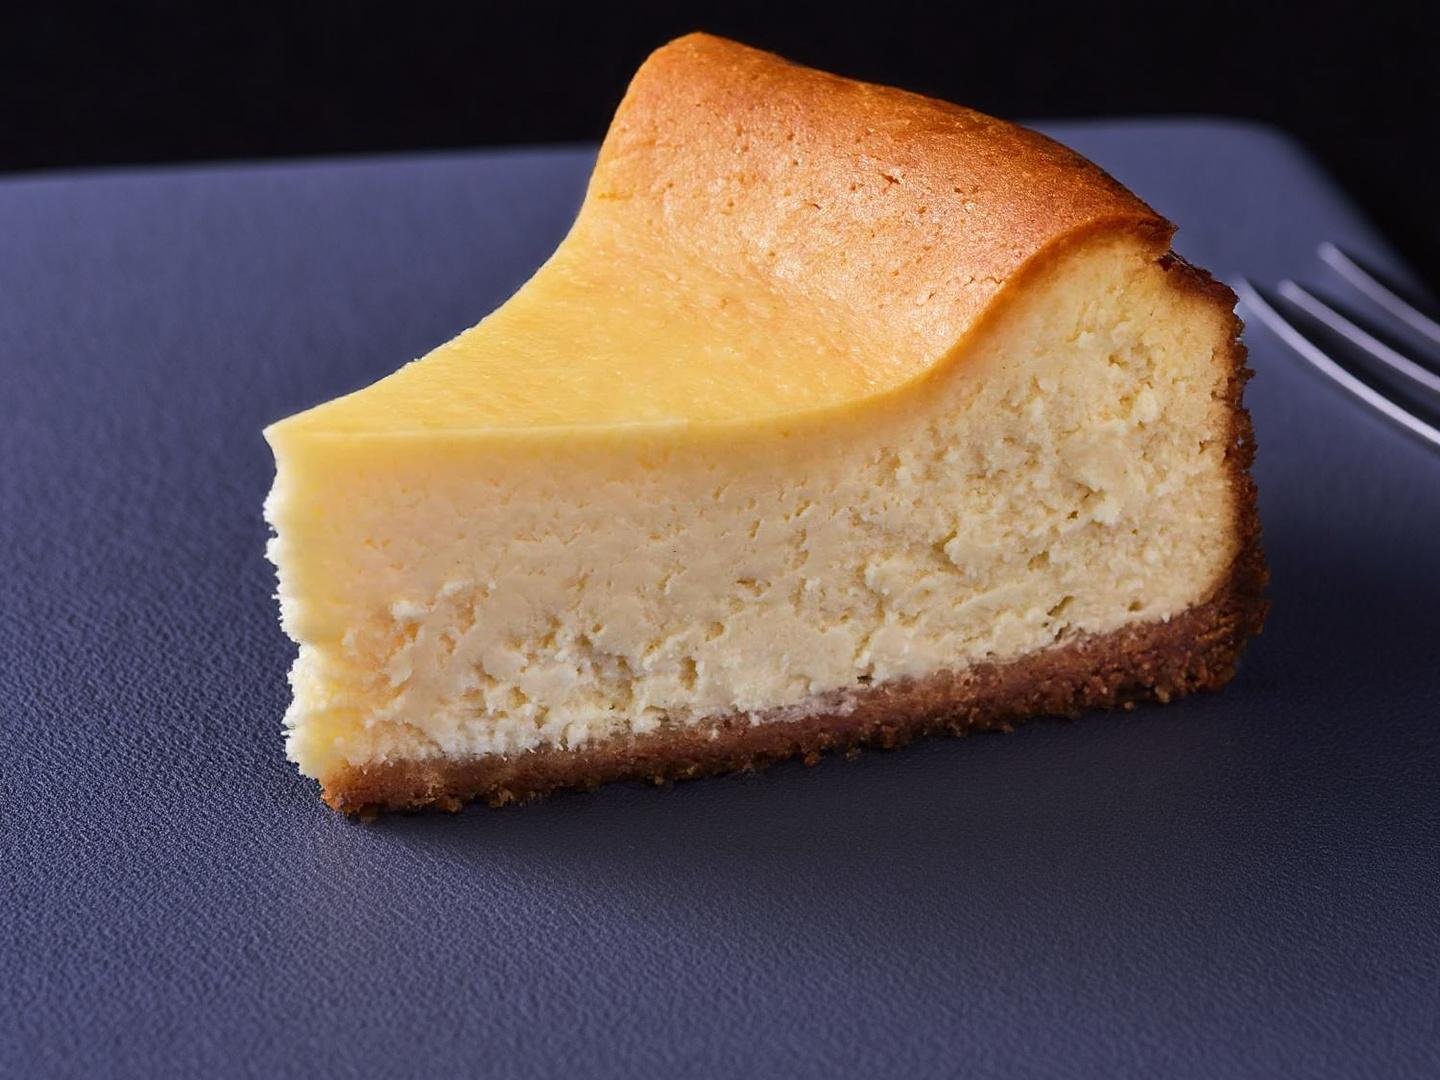
New York Style
The deli classic: dense, rich, and tall. Made with cream cheese, heavy cream or sour cream, eggs, and minimal flour. The texture is dense and velvety—almost like sweetened cream cheese. This is what most people picture when they think "cheesecake."
Italian Style
Made with ricotta cheese, often with candied fruit. Lighter and grainier than New York style, with a more complex flavor. Traditional in Italian bakeries, especially around Easter.
Japanese Style
A jiggly, souffle-like cheesecake made by folding whipped egg whites into the batter. Much lighter than American versions, with a cottony texture. Requires more technique but produces a unique, ethereal result.
No-Bake Style
Set with gelatin or simply chilled until firm. Quick and easy but with a mousse-like texture that's distinctly different from baked versions. Great for summer when you don't want to heat up the oven.
Key Ingredients and Their Roles
Cream Cheese: The Foundation
Use full-fat, block-style cream cheese (not the spreadable kind in tubs—it contains stabilizers that affect texture). Philadelphia is the gold standard, but store brands work fine.
Critical: Cream cheese must be at room temperature before mixing. Cold cream cheese won't beat smooth no matter how long you try, resulting in a lumpy cheesecake. Set it out 2-3 hours before baking.
Eggs: Structure and Richness
Eggs provide structure and richness. Most recipes call for whole eggs plus extra yolks—the yolks add richness while the whites help set the filling.
Key technique: Add eggs one at a time, mixing only until just incorporated after each. Overmixing after adding eggs incorporates excess air, which expands during baking and contracts during cooling—causing cracks.
Sour Cream: Tangy Richness
Sour cream adds tanginess that balances sweetness and contributes to creamy texture. Some recipes use heavy cream instead, which produces a sweeter, denser result. Full-fat sour cream with live cultures also offers probiotic benefits.
Gut Health Note
Quality cheesecake made with fresh sour cream containing live cultures provides some probiotic benefits. The eggs contribute complete protein, and the cream cheese offers calcium. For better gut health, use minimally processed dairy products and consider topping with fresh berries for fiber and polyphenols.
The Perfect Crust
Graham cracker crust is classic, but the technique matters as much as the ingredients:
The Ratio
2 cups crumbs : 3 tbsp sugar : 6 tbsp melted butter
The mixture should hold together when squeezed but not be overly wet. Too much butter makes a greasy crust; too little makes it crumbly.
Pressing Technique
Use the bottom of a measuring cup or glass to firmly press the crust into the pan. It should be compact and even—loose crumbs absorb moisture from the filling and become soggy. Press onto the bottom and about 1 inch up the sides.
Pre-Baking
Bake the empty crust at 325°F for 10 minutes before adding filling. This sets the structure and prevents sogginess. Let it cool while you prepare the filling.
Mixing the Filling: The Low and Slow Approach
The key to crack-free cheesecake starts in the mixing bowl:
- Beat cream cheese alone until completely smooth, 3-4 minutes. Scrape the bowl frequently—lumps of cold cream cheese hide in corners.
- Add sugar and flour, beat until combined.
- Add sour cream and flavorings, mix until smooth.
- Add eggs one at a time on LOW speed, mixing only until each disappears into the batter. Don't beat vigorously.
Why low speed for eggs? Fast mixing incorporates air bubbles. During baking, these bubbles expand. During cooling, they contract and collapse—hello, cracks. Gentle mixing = minimal air = smooth cheesecake.
The Water Bath Method
A water bath (bain-marie) is the single most important technique for perfect cheesecake. Here's why it matters:
Why Use a Water Bath?
- Even heat: Water can't exceed 212°F, so the cheesecake bakes gently and evenly
- Humidity: Steam prevents the surface from drying and cracking
- Gradual cooking: The edges don't overcook while the center catches up
How to Set Up a Water Bath
- Wrap the pan: Cover the outside of your springform pan with two layers of heavy-duty aluminum foil, coming up the sides. This prevents water from leaking into the crust.
- Place in larger pan: Set the wrapped springform inside a roasting pan or larger baking dish.
- Add hot water: After placing in the oven, pour hot water into the larger pan until it reaches halfway up the sides of the springform.
No-Leak Alternative
Worried about foil leaks? Place a baking sheet on the rack below the cheesecake with a few cups of water. The steam provides similar benefits without the risk of water touching your crust.
The Complete Guide to Preventing Cracks
Cracks happen when the top of the cheesecake sets before the center, then the center contracts as it cools and pulls the surface apart. Prevent this by:
- Room temperature ingredients: Everything must be at room temperature for smooth mixing
- Don't overmix after adding eggs: Mix on low, just until combined
- Use a water bath: For gentle, even heat
- Don't overbake: The center should still jiggle like Jell-O when done
- Cool gradually: Turn off oven, crack door, cool inside for 1 hour before refrigerating
- Don't open the oven: Temperature fluctuations cause problems
If Cracks Happen Anyway
Don't despair! Cover them with:
- Sour cream topping (mix sour cream with sugar and vanilla, spread over warm cheesecake, bake 5 more minutes)
- Fresh fruit
- Chocolate ganache
- Whipped cream
Cracks don't affect flavor—only appearance. And honestly, homemade cheesecake with a small crack is still miles better than store-bought.
Flavor Variations
Once you've mastered the classic, experiment with these variations:
- Chocolate: Add 8 oz melted cooled chocolate to the batter; use chocolate cookie crust
- Strawberry: Swirl strawberry preserves through batter before baking
- Lemon: Add 2 tbsp lemon juice and 1 tbsp zest to filling
- Pumpkin: Add 1 cup pumpkin puree and pumpkin pie spices; reduce sour cream slightly
- Oreo: Use crushed Oreos for crust; fold crushed Oreos into filling
- Salted Caramel: Drizzle caramel over crust before adding filling; top with more caramel and flaky salt
Classic Toppings
- Fresh berries (classic for good reason)
- Sour cream topping with vanilla
- Cherry or blueberry pie filling
- Salted caramel sauce
- Chocolate ganache
- Lemon curd
Storage and Make-Ahead
- Refrigerate: Up to 5 days, covered loosely
- Freeze: Up to 2 months. Wrap whole cake or individual slices tightly in plastic and foil. Thaw overnight in refrigerator.
- Best served: Slightly chilled, not ice-cold. Remove from fridge 20-30 minutes before serving for best texture and flavor.
The bottom line: Cheesecake success comes down to understanding why things go wrong. Room temperature ingredients, gentle mixing, a water bath, not overbaking, and gradual cooling—master these fundamentals and you'll produce cheesecake that rivals any bakery. The technique takes a little practice, but the results are absolutely worth the effort. And remember: even a cracked cheesecake tastes incredible.