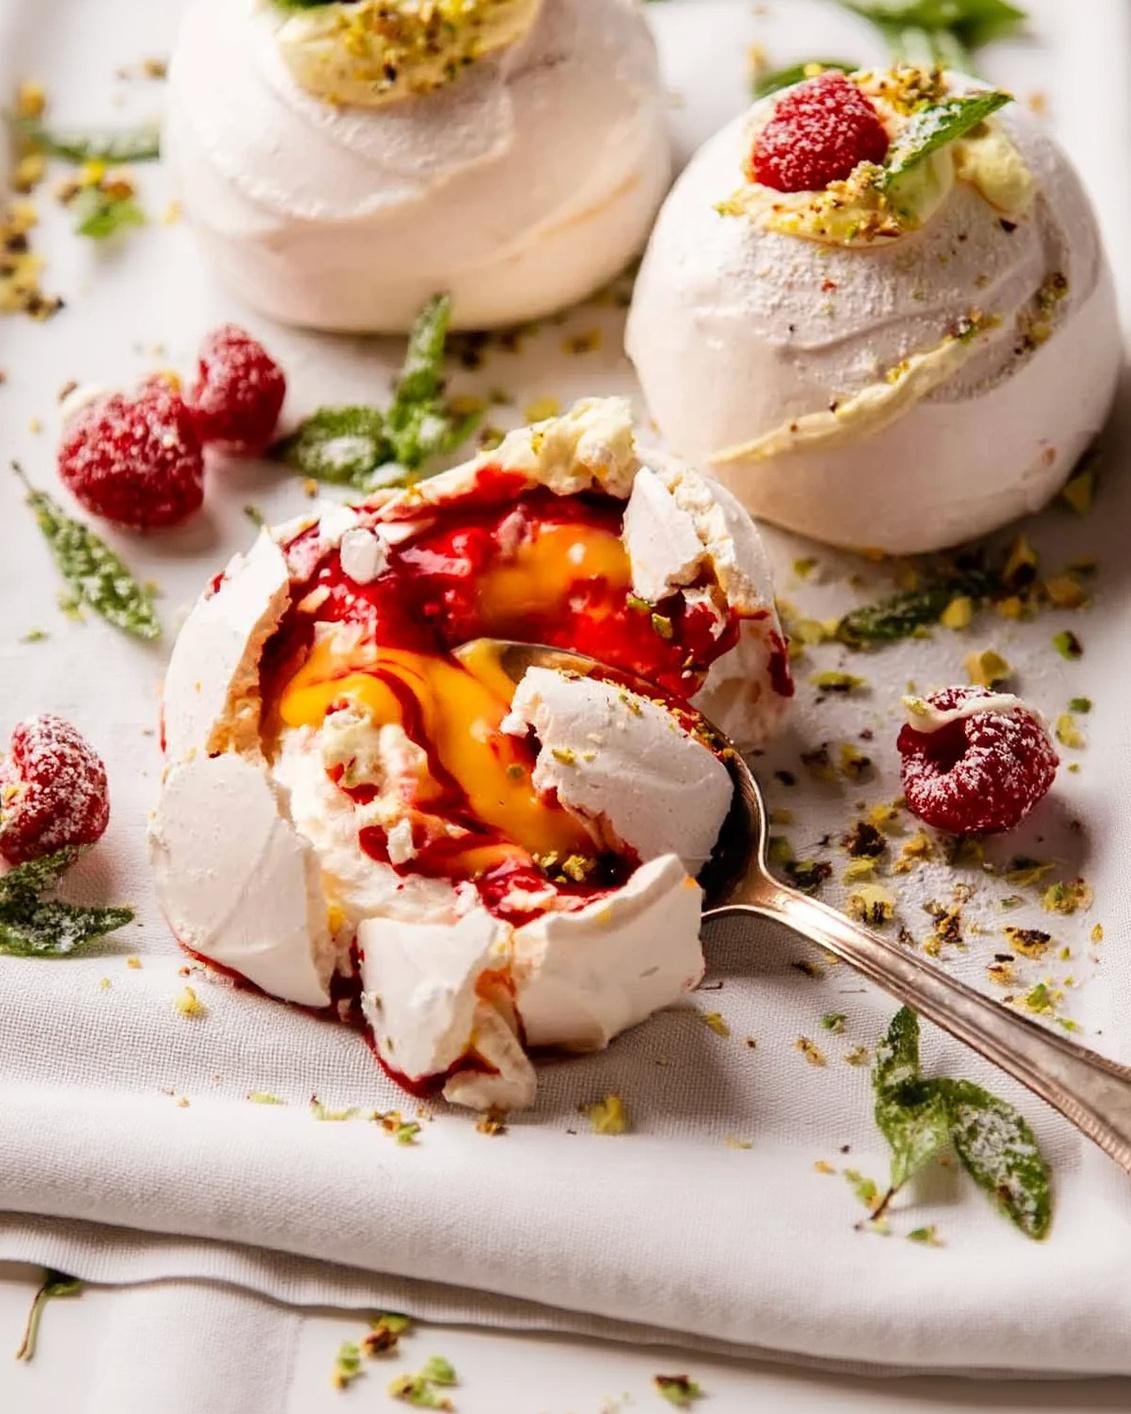
Few desserts capture elegance quite like a perfectly executed pavlova. Named after the Russian ballerina Anna Pavlova, this meringue-based masterpiece has sparked friendly rivalry between Australia and New Zealand, both claiming its invention. Regardless of its origins, one thing is certain: when you nail this recipe, you create something truly spectacular—a cloud-like dessert with a crisp exterior that shatters delicately, revealing a pillowy, marshmallow-soft center crowned with billowing cream and jewel-toned fruits.
What Is Pavlova?
Pavlova is a meringue-based dessert with a crisp crust and soft, marshmallow-like center, typically topped with whipped cream and fresh fruit. Unlike regular meringue which bakes dry throughout, pavlova's secret lies in two humble additions: vinegar (or cream of tartar) and cornstarch.
These ingredients create a chemical reaction during baking that prevents the center from fully drying out, resulting in that signature contrast between the crispy shell and soft interior. The acid from vinegar helps stabilize the egg white proteins, while cornstarch absorbs moisture and creates that distinctive chewy center.
Our Pavlova Recipes
The Science Behind Perfect Pavlova
Understanding the science helps you troubleshoot problems before they happen:
- Egg whites are essentially protein and water. When you whip them, you're unfolding those proteins and trapping air, creating foam.
- Sugar stabilizes this foam by bonding with the proteins and drawing out moisture.
- Vinegar denatures proteins further (making them more stable) and keeps the meringue white.
- Cornstarch absorbs moisture during baking, ensuring your pavlova doesn't weep or collapse.
The low baking temperature is crucial—it dries the exterior without browning it, while leaving the interior just set enough to be marshmallowy.
Essential Equipment for Pavlova Success
- Stand mixer or electric hand mixer: Whipping meringue by hand is possible but exhausting. A mixer ensures you reach stiff peaks without arm fatigue.
- Completely clean, grease-free bowl: Even a trace of fat will prevent egg whites from whipping properly. Glass or metal bowls work best—plastic can harbor oils.
- Parchment paper: Creates a non-stick surface for easy removal and allows you to trace your desired shape as a guide.
- Rubber spatula: For gentle folding of cornstarch and vinegar without deflating the meringue.
- Oven thermometer: Many ovens run hot or cold; accurate temperature is crucial for pavlova. The difference between 250°F and 275°F matters significantly.
Step-by-Step Technique for Flawless Pavlova
1. Preparing Your Egg Whites
Room temperature egg whites whip to greater volume than cold ones. Separate eggs carefully—even a speck of yolk (which contains fat) can sabotage your meringue.
Pro tip: For easiest separation, work with cold eggs, but let the whites sit at room temperature for 30 minutes before whipping. Older eggs (1-2 weeks old) actually whip better than fresh ones because the proteins have loosened slightly.
2. Achieving Stiff Peaks
Start whipping on medium speed until the whites become foamy. Then increase to medium-high and add sugar gradually—about one tablespoon at a time—while continuously beating.
This slow addition allows the sugar to dissolve completely. Rush this step and you'll end up with grainy meringue that weeps sugar droplets.
How to know you've reached stiff peaks: The meringue holds its shape firmly when the beaters are lifted and doesn't droop. The mixture should be glossy and smooth. Rub a bit between your fingers—it should feel completely smooth, not gritty.
3. The Critical Folding Step
Once your meringue is ready, gently fold in the cornstarch, vinegar, and vanilla. Use a large spatula and work with deliberate, sweeping motions—cutting down through the center, sweeping along the bottom, and folding over.
You want to incorporate these ingredients without knocking out the precious air you've just beaten in. Ten to fifteen folds should suffice. Don't worry about a few streaks—overfolding is worse than underfolding.
4. Shaping Your Pavlova
Spoon the meringue onto your prepared baking sheet, using your traced circle as a guide. Create a nest shape with slightly raised edges and a depression in the center—this will hold your cream and toppings.
For a more rustic look, use sweeping motions to create peaks and swirls. For an elegant finish, smooth the sides with an offset spatula. Both are beautiful—choose your style.
5. The Low and Slow Bake
Pavlova requires low heat for an extended period. Bake at 250°F (120°C) for 1.5 to 2 hours. The low temperature allows the exterior to dry and crisp without browning excessively while keeping the interior soft.
Critical: Resist the temptation to open the oven door during baking—temperature fluctuations cause cracks. When done, the pavlova should be pale cream-colored (not white, not brown) with a firm, dry surface.
6. The Crucial Cool-Down
Perhaps the most important step for preventing cracks: turn off the oven, crack the door slightly (prop it open with a wooden spoon), and let the pavlova cool completely inside the oven.
This gradual temperature change prevents the dramatic cracking that occurs when a hot pavlova meets cold air. Plan for at least 2-3 hours of cooling time, or simply bake the night before and leave it in the oven overnight.
The Overnight Method
Many professional bakers swear by the overnight method: bake your pavlova in the evening, turn off the oven, and leave it inside with the door closed until morning. The slow, gradual cooling produces the most stable, crack-resistant results.
Troubleshooting Common Pavlova Problems
Problem: Pavlova Cracked on Top
Some cracking is almost inevitable and adds rustic charm—professional pastry chefs often embrace it. However, excessive cracking usually results from:
- Cooling too quickly (always cool in the oven)
- Oven temperature too high
- Overbaking
- Opening the oven door during baking
Solution: If cracks bother you aesthetically, simply pile on extra cream and fruit to hide them beautifully. Nobody will ever know.
Problem: Weeping or Beading
Sticky beads on the surface (weeping) occur when sugar isn't fully dissolved during whipping, or from humidity during baking.
Solutions:
- Add sugar very slowly, ensuring it's completely dissolved before adding more
- Rub a bit between your fingers—it should feel smooth, not gritty
- Avoid baking on humid days
- Use superfine (caster) sugar which dissolves more easily
Problem: Chewy Throughout (No Crisp Shell)
If your pavlova is soft all the way through without any crisp exterior, it likely underbaked. The outside needs sufficient time to dry completely.
Solution: Extend baking time in 15-minute increments until the surface feels dry and papery to a light touch. Next time, check your oven temperature with a thermometer.
Problem: Collapsed or Flat
A deflated pavlova usually means:
- The meringue wasn't whipped enough (didn't reach true stiff peaks)
- The cornstarch and vinegar were folded in too vigorously, knocking out air
- The bowl or beaters had traces of fat
Solution: Ensure you reach true stiff peaks—the mixture shouldn't move when you turn the bowl upside down. Fold additions gently with minimal strokes.
Creative Toppings and Variations
Classic Combinations
- Summer Berry: Strawberries, raspberries, blueberries, and blackberries with vanilla whipped cream
- Tropical Paradise: Mango, passion fruit, kiwi, and coconut cream
- Stone Fruit Season: Peaches, nectarines, and cherries with amaretto cream
- Citrus Burst: Lemon curd, candied citrus, and orange zest cream
Showstopping Variations
- Chocolate Pavlova: Fold 2 tablespoons cocoa powder into the meringue, top with chocolate ganache and raspberries
- Eton Mess Pavlova: Intentionally crush the pavlova and layer with cream and strawberries in glasses
- Mini Pavlovas: Pipe individual nests for elegant dinner party desserts
- Pavlova Wreath: Shape as a ring for spectacular holiday presentations
Gut Health Boost
Maximize your pavlova's nutritional value by loading it with fresh berries. Blueberries, raspberries, and strawberries are rich in polyphenols that support beneficial gut bacteria. Add a layer of Greek yogurt beneath the whipped cream for probiotic benefits—the tanginess beautifully complements the sweet meringue.
Make-Ahead Tips for Stress-Free Entertaining
- 2-3 days ahead: Bake the meringue base and store in an airtight container at room temperature (never refrigerate—moisture is the enemy)
- 1 day ahead: Prepare fruit toppings and store covered in the fridge. Wash berries just before serving.
- 4 hours ahead: Whip cream and refrigerate. It may need a quick re-whip before using.
- 30 minutes before serving: Assemble the pavlova. The meringue will soften slightly from the cream and fruit, but this is perfectly fine—it should be eaten within 2-3 hours for best texture.
The bottom line: Pavlova may seem intimidating, but with the right technique and a little patience, anyone can master this stunning dessert. Remember the essentials: room temperature eggs, gradual sugar addition, gentle folding, low oven temperature, and slow cooling. Accept that some variation and cracking is part of pavlova's charm—it's meant to look homemade and impressive, not factory-perfect. Once you've experienced the magic of cutting into that crispy shell to reveal the marshmallow center, topped with clouds of cream and fresh fruit, you'll understand why this dessert has remained beloved for over a century.